Introduction
This post gives step by step instructions for adding code coverage with gcov to a google test eclipse project that is built as part of a CI process on Jenkins. This post starts from the point of already having a project compiled by a gnu compiler, in an eclipse CDT project that is being build on Jenkins. These posts give the information required to get to this stage.
Using google test with CDT in eclipse
Integrating SVN, Trac and Jenkins with eclipse
Automating eclipse CDT build on Jenkins
To enable code coverage with gcov the project needs to be instrumented (build with flags that cause the raw coverage information to be saved when an executable runs). Having built the code with these flags enabled, and run the executable, both eclipse and Jenkins can be configured to view the coverage.
Enabling code coverage in the build
To determine what code coverage the unit tests have in the unit test project in eclipse: Right click on the project and select Properties->C/C++ Build->Settings->Tool Settings->GCC C++ Compiler->Debugging and check Generate gov information (-ftest-coverage -profile-arcs).
Still in the Properties->C/C++ Build->Settings->Tool Settings select MinGW C++ Linker->Miscellaneous and then in the Linker flags box add -ftest-coverage -fprofile-arcs.
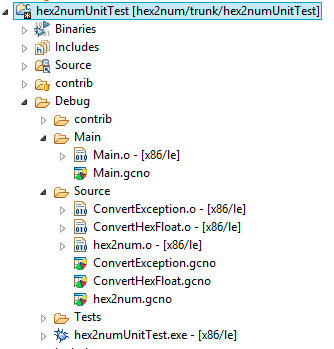
Click OK to close the properties dialog. clean the project and the build, then look in the Debug folder and there should be a .gcno file for every source file.
Coverage Reports in eclipse
CDT includes support for gov, however this support relies on external tools that must be in the path. I tried to add them to the path in the eclipse project, I couldn’t get it to work, so I had to extend the Windows environment variable path. The path needs to include a path to addr2line, c++filt and nm, with my install of minGW I added c:mingwbin. Shutdown and restart eclipse so that it has access to the new path.
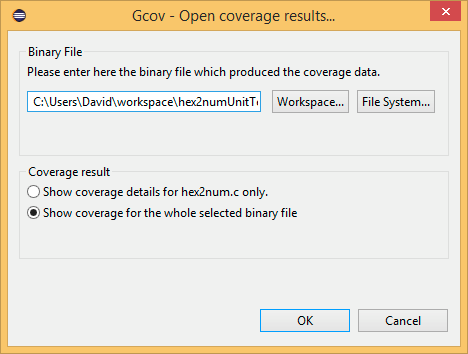
Now run your unit test application in eclipse, this will generate a .gcda for each source file. Now if you open any .gcda or .gcno file you should see
Click OK and the gov tab should be opened with coverage shown
NOTE: If you get an error here the most likely reason is that the gcov data is not all from a single binary version of the test application. The quick way to resolve this is to delete the Debug directory, rebuild and rerun the tests.
NOTE: When you double click on a file in the gov tab it opens the associated source file and should show line by line the coverage. Except in my scenario it doesn’t for linked folders. To see line by line coverage open the file of interest from the linked folders, open the file from under the unit test project, the coverage will show. This is being tracked as bug
447554 in the eclipse bugzilla.
(Update 9 January 2016 – This is now fixed in updates-nightly-mars, Thank you Jeff)
Coverage in Jenkins
To get a coverage report added to the Jenkins job we have to convert the gcov output into a a format that can be understood by Jenkins (using gcovr) and then configure Jenkins with the cobertura plugin.
gcovr
gcovr is a python application, so before it can be used you need python installed on the jenkins slave. Download and install active python from
https://www.activestate.com/activepython/downloads. In my case I downloaded the ActivePython 2.7.10.12 (x64). I accepted all defaults on the installer.
Open a command prompt and install gcovr
pypm -g install gcovr

I found it very hard to get the correct options on gcovr for the files I wanted in the output. I installed activepython and gcovr in the same way on my desktop machine, and experimented in the eclipse workspace. For me with an eclipse workspace at C:UsersDavidworkspace. Running the command below from C:UsersDavidworkspacehex2numSource I got the desired output. i.e. coverage for each source and include file being tested in hex2num.
python c:Python27Scriptsgcovr -r . –object-directory= ….hex2numUnitTestDebug -f .*\hex2num\Include\ -f .*\hex2num\Source\
cobertura
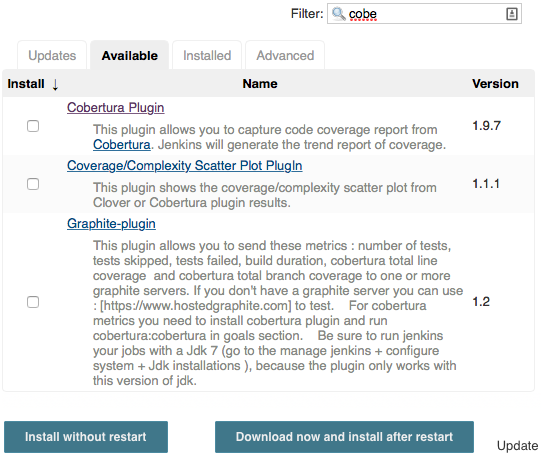
Cobertura is a plugin for Jenkins that displays code coverage. To install the plugin login to Jenkins and go to
Manage Jenkins->Mange Plugins->Available, select
Cobertura Plugin, click
Install without Restart.
For the Jenkins job you are configuring (in this example hex2num) go to the job configuration page, select Add Build Step->Execute Windows batch command. Add the following to go to the correct directory, I have added flags to generate xml output to a named file.
cd hex2numsource
python c:Python27Scriptsgcovr -r . –object-directory= ….hex2numUnitTestDebug -f .*\hex2num\Include\ -f .*\hex2num\Source\ -x -o ….gcovr.xml
Then select Add post-build action->Publish Cobertura Coverage Report, enter the path to the generated results file. Selecting Advanced allows a variety of options to be set.
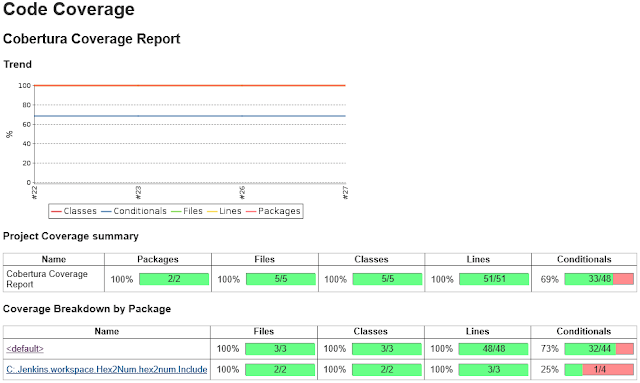
Run a build and you should start to see code coverage reports, once a second build has been run you should start to see graphs. You can also drill in for more details.
Getting painted files to show in Cobertura
Although cobertura is displaying coverage there are two problems
- The package names don’t read well
- Painted source files don’t show as cobertura cannot find the source files
To resolve this I wrote a small python script to patch the paths in the gcovr.xml files. Save this source as C:Python27ScriptsCorrectGcovrPaths.py.
try:
import xml.etree.cElementTree as ET
except ImportError:
import xml.etree.ElementTree as ET
import sys
gcovrXmlFilename=sys.argv[1]
paths = sys.argv[2:]
tree = ET.ElementTree(file=gcovrXmlFilename)
for packageElement,path in zip(tree.iter(tag=’package’),paths):
packageElement.set(‘name’,path)
for classElement in packageElement.iterfind(‘classes/class’):
filename = classElement.get(‘filename’)
filename = filename.split(‘\’)[-1:][0]
filename = path+”/”+filename
classElement.set(‘filename’, filename)
tree.write(gcovrXmlFilename)
In the jenkins job, change the windows batch command that runs gcovr so that it looks like this.
The script reads the file in the first argument (gcovr.xml), renames the first package(directory) to the next argument and sets the path for all classes (files) in the package, the second argument is processed similarly. More arguments can be added for additional packages.
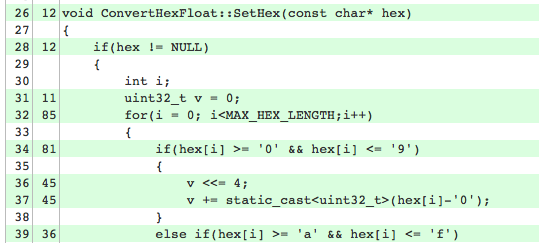
In Jenkins you can then see nicely painted sources like this


