Introduction
I have previously installed Jenkins, SVN and Trac on a single Raspberry Pi 2, with the intention of having a home Continuous Integration server (CI). I now want to get a visual studio 2013 solution built by Jenkins.
As a first project I have decided to get googletest (gtest) to build. As a precursor I have downloaded version 1.7.0 and added it to my local SVN repository, I then copied the msvc directory to msvc2013, open the solution in VS2013, allowed the onetime upgrade to happen, and then committed the new directory. If I build locally gtest builds with a couple of warnings (which is good because we can then check that jenkins sees the warnings).
I have a clean windows 8.1 PC (virtual machine actually) with Visual Studio 2013 Community Edition installed, and the latest version of Java installed (Version 8 update 51).
As a starting point I am following the Step by Step guide to setup master and slave in the Jenkins documentation.
Configuring the Jenkins Master
In a browser on the intended Jenkins slave, open up the Jenkins server main page (In my case http://xxx.xxx.xxx.xxx:8080, where xxx.xxx.xxx.xxx is the IP address of my RPi). Select Manage Jenkins->Manage Nodes and then select New Node.
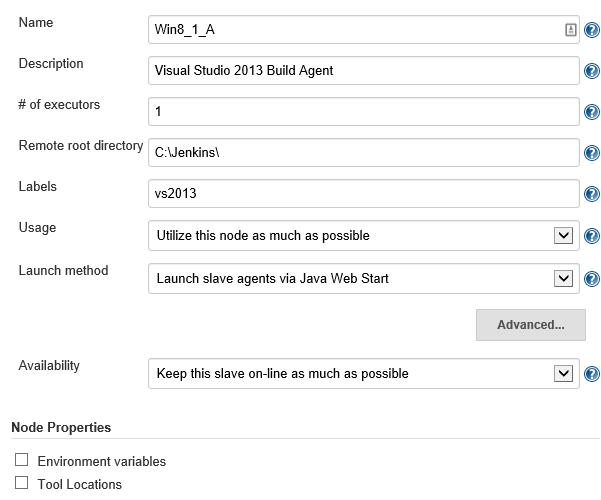
Enter a name for Jenkins to reference the slave as and select Dumb Slave, click OK. You are then shown the Configure page for the slave, these are the initial settings I choose, the Label is important, I use it later when setting up the build to identify this as a suitable slave to build on.
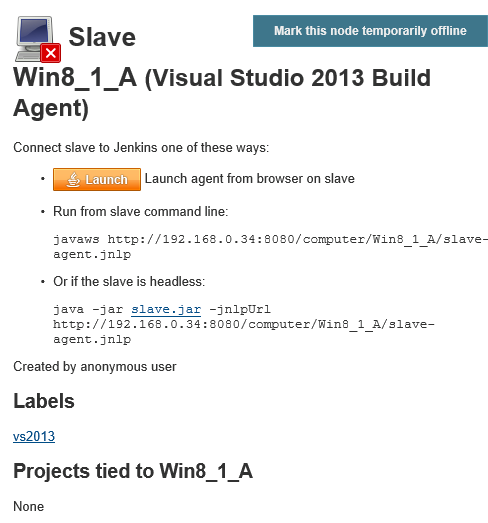
Save and then click on the newly added node and then click the Launch button.
I had to edit the Java security settings in the control panel on the PC to make http://192.168.0.34:8080/ a trusted site, the Jenkins slave then launched successfully
For now I want to launch the slave manually, so the configuration of master and slave is done.
Adding the required plugins to Jenkins
I browsed to Jenkins->Manage Jenkins->Manage Plugins. Before adding new plugins I decided to update all installed plugins to their latest version.
I then selected the Available tab and added the following plugins MSBuild, Log Parser, Warnings, Static Analysis Collector.
I browsed to Jenkins->Manage Jenkins->Configure System, scrolled down to MSBuild and added the following configuration.
Note: the location of MSBuild is specific to each version of Visual Studio, This plugin only offers one global path setting for each MSBuild installation, so every build slave that you create a particular Visual Studio Installation on must have the same install path for MSBuild. I don’t think this is any great restriction.
Configuring the Build
In a browser go to Jenkins and select New Item, enter an item name (The name of your build, I use GoogleTestVS2013). You are then faced with the project configuration page, the exact content of this page depends on which plugins you have installed. The key sections are
Restrict the build to only run on slaves with vs2013 installed.
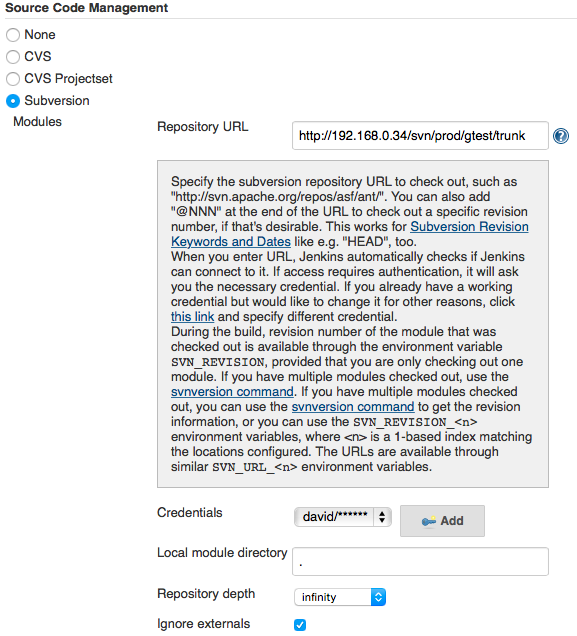
Link to the source code to checkout
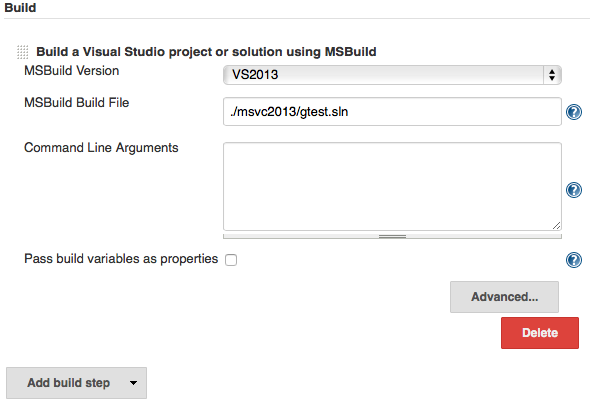
Click Add build Step and select Build a Visual Studio project or solution using MSBuild
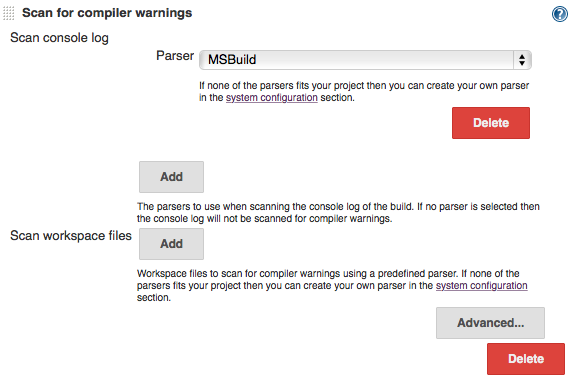
Click Add post-build action and select Scan for compiler warnings
For me that was sufficient, Jenkins can now checkout and build my visual studio project, after the build warnings are shown.


