Introduction
When I decided to use eclipse to do some cross development for the Raspberry Pi hosted on windows I was surprised to find that I found lots of useful posts elsewhere that gave a part of the solution, or worked well on a Linux host. I found both of the sites below to be particularly helpful. http://www.gurucoding.com/en/raspberry_pi_eclipse/index.php
http://gnutoolchains.com/raspberry/tutorial/
My blog post Using google test with CDT in eclipse gives details on how to install eclipse CDT, which is an assumed starting point for this post.
Install GCC Cross compiler
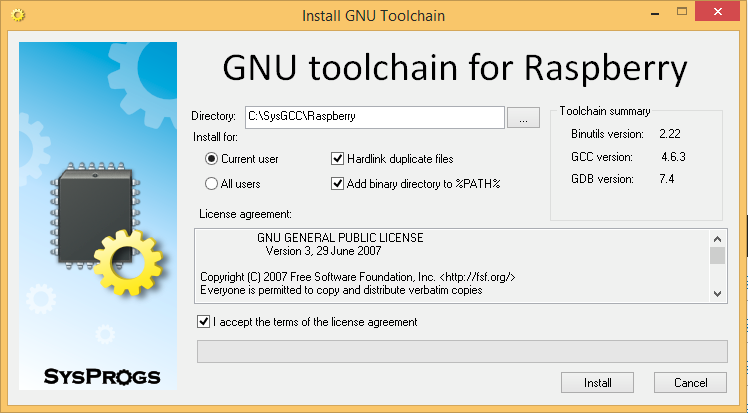
It is possible to build your own GCC cross compiler, however this is a complex process and prebuilt versions are available. I choose to download from
http://gnutoolchains.com/raspberry/, and selected raspberry-gcc4.6.3.exe to match wheezy raspbian. Installation was as simple as running the executable and accepting the terms of the license.
Synchronise header file and library versions
This step is required to ensure that the versions of headers and libraries used on the Raspberry Pi match those used by the cross compiler.
Run c:SysGCCRaspberryTOOLSUpdateSysroot.exe
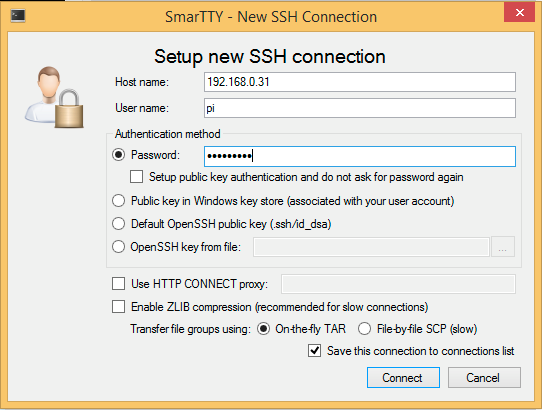
Press Select… and setup a new SSH connection to your Raspberry PI (Mine is running a newly installed image and has the default username and password).
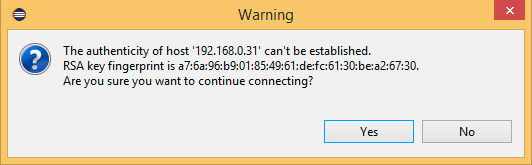
Click Connect and then save the key when prompted, then click Synchronize, wait while the headers and libraries are copied (This takes a few minutes).
NOTE: Whenever you update your RPi it is a good idea to resynchronize to ensure that your development environment remains in step with your target.
Configure eclipse for cross compilation
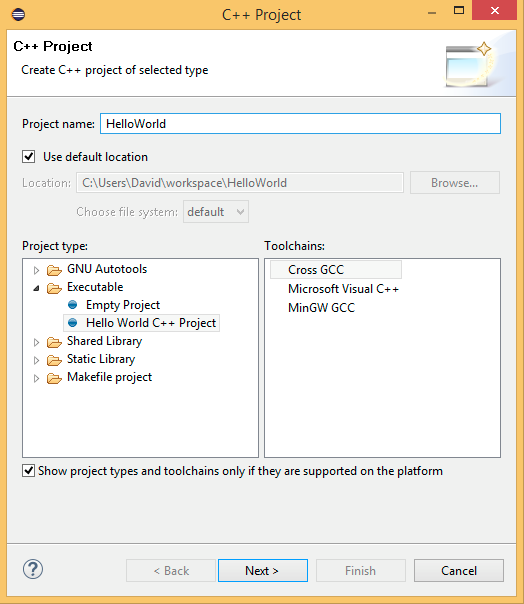
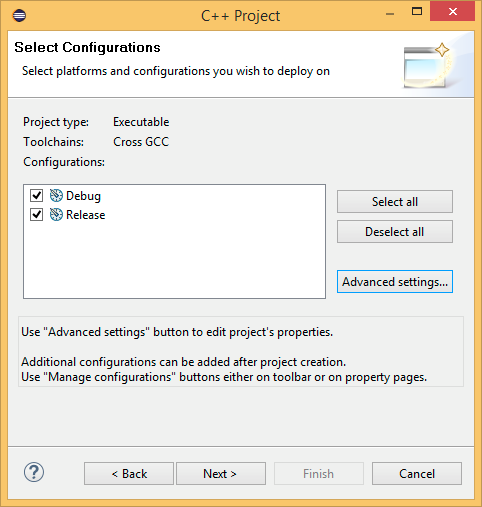
Open eclipse and in the Project Explorer right click and select New…->C++ Project. Select the Hello World C++ Project and Cross GCC, give the project a name.
Click Next> and customise as you wish
Click Next>
Click Next> and specify the cross-compiler prefix as arm-linux-gnueabihf- and cross-compiler path as C:SysGCCRaspberrybin.
Click Finish and then build the project, there should be no errors.
Configure RPi for gdb
Run SmarTY.exe from C:SysGCCRaspberryTOOLSPortableSmartty, and open the connection to your RPi.
Enter these commands
Verify that gdbserver is on the path and the version of gdbserver that is installed
gdbserver --version
To automate the use of gdb on the target RPi it needs to have the DataStore server running.
Download the server from
http://download.eclipse.org/tm/downloads/index.php, I used the 3.6M4 release and downloaded
rseserver-linux-3.6-M4.tar to the /tmp directory on the RPi. Following the install advice from the eclipse help I executed these commands on the RPi
sudo mkdir /opt/rseservercd /opt/rseserversudo tar xf /tmp/rseserver-linux-3.6-M4.tar
The daemon needs to be run as root, so it can be manually started by
sudo su
cd /opt/rseserver
perl ./daemon.pl &
To have it start automatically each time the RPi reboots, edit /etc/rc.local and just before the exit 0 at the end of the default file launch the server
cd /opt/rseserver
perl ./daemon.pl &
When the RPi reboots you should see a message that says
Daemon running on: raspberry, port: 4075
Configure eclipse for Cross debugging
Right click on the HelloWorld project in the project explorer and New->File, set the name to .gdbinit and click Finish.
In the file set sys root to point to the cross tools set sysroot C:SysGCCRaspberryarm-linux-gnueabihfsysroot
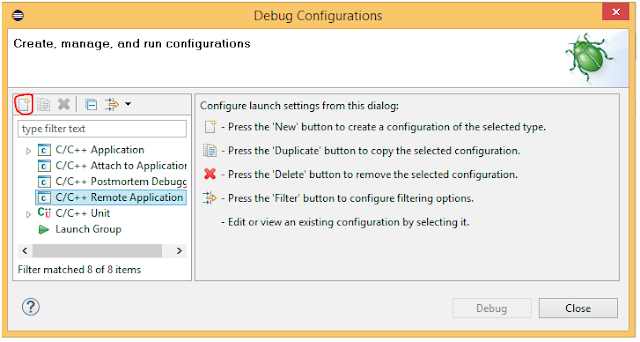
In the project explorer right click on the HelloWorld project and select Debug As->Debug Configurations…, then select C/C++ Remote Application and click the New button (circled).
In the Debug Configurations Dialog the first step is to configure a connection to the Raspberry Pi, to do this, next to Connection: click New…
Select a Remote System type of Linux, and click Next>
Enter the IP address of your RPi in Host name:, name the connection and set a description, then Next>.
Click Next>
Click Finish, ensure that the Connection: is set to your new connection
Then click Browse… under Remote Absolute File Path for C/C++ Application:
Then try to expand My Home, you will be prompted for user credentials and certificates
Select the remote-debugging directory and click OK.
When the binary is transferred to the raspberry pi we need to ensure that it has execute permissions set, so in the Commands to execute before application enter chmod 777 /home/pi/remote-debugging/HelloWorld
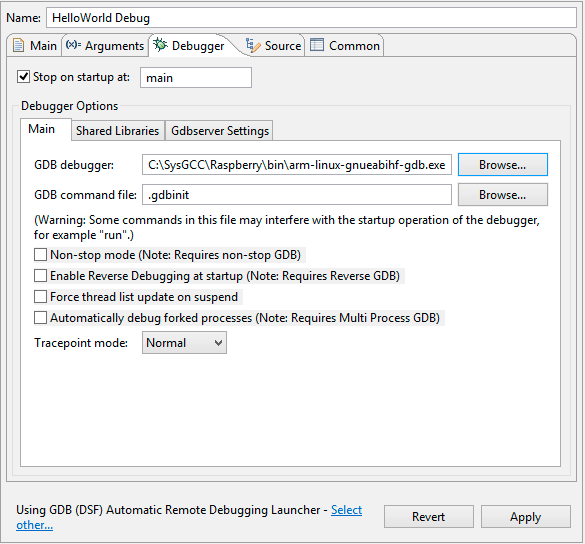
Now in the Debug Configurations dialog select the Debugger tab and on the Main sub-tab browse to the arm-linux-gnueabihf-gdb.exe debugger.
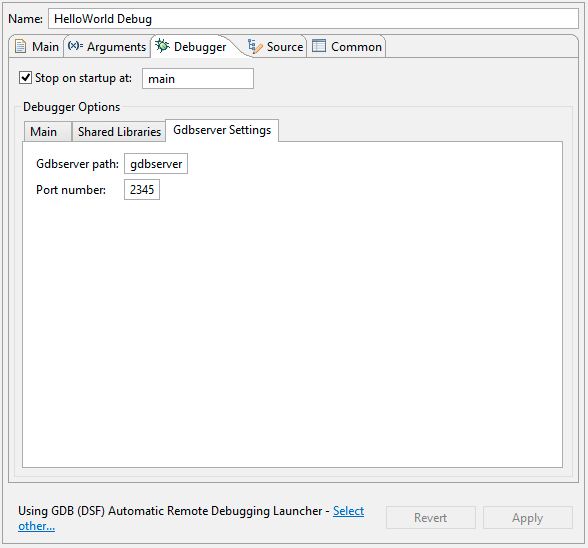
Now select the Gdbserver Settings sub-tab, the default settings worked for me and looked like this.
Apply these settings, and Close.
Click Window->Perspective->Open Perspective->Other... select Remote System Explorer, and click OK.
In the Remote Systems tab right click on your connection and select Connect. (I found if I didn’t connect to the RPi before launching the debugger the launch would fail, retrying usually worked – but this is cleaner).
Now select Run->Debug Configurations, ensure your configuration is selected (it should be) and click Debug. You will be prompted to confirm the perspective switch, tick to Remember your decision and click Yes.
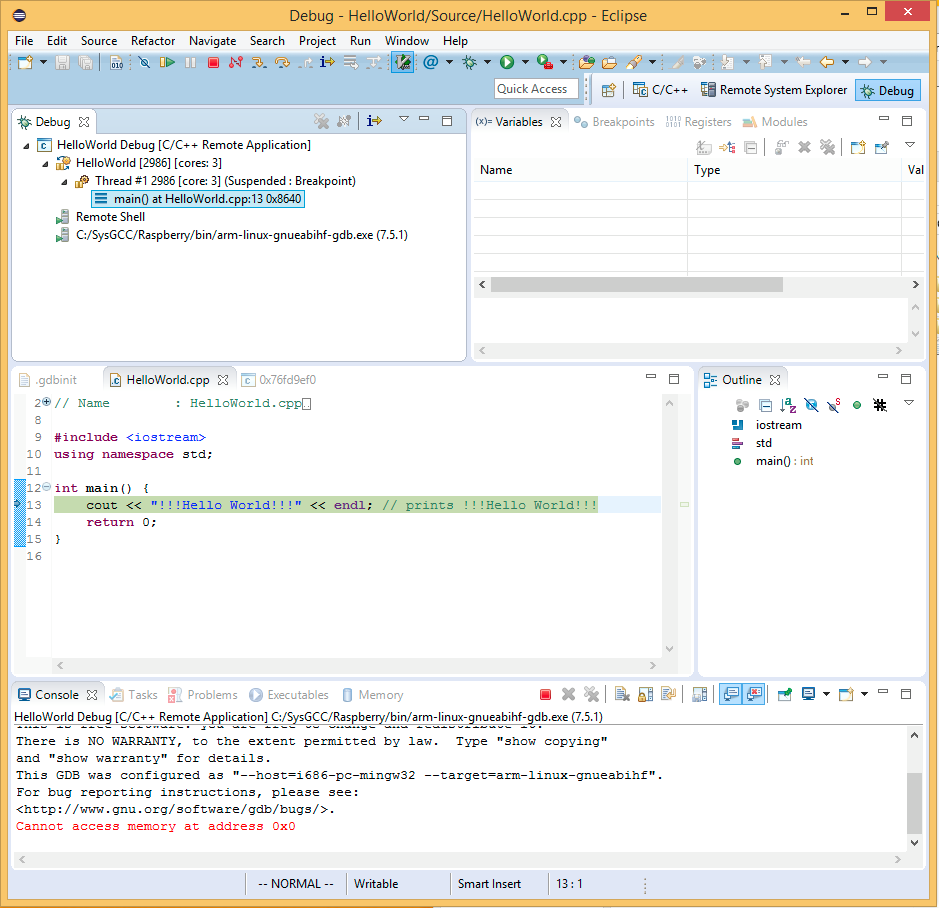
You should then see your application stopped on the first line and ready to be debugged
I have tested this setup with setting breakpoints, viewing disassembly, stepping into and out of functions and inspecting variables. It all seems to work, however I have not yet diagnosed the error Cannot access memory at address 0x0. I will update this post if/when I get to the bottom of it.
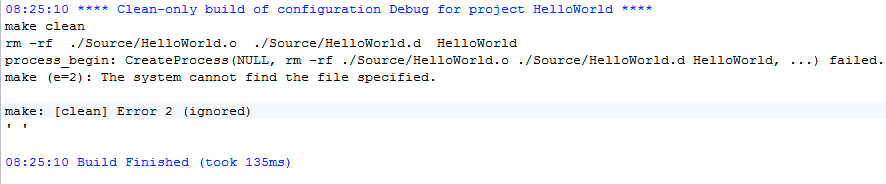
Clean error
If you don’t have rm.exe on your path you will see an error like this when you clean the project.
This can be resolved by downloading rm.exe as part of MinGW, find the path to rm.exe, (with a default install it is C:MinGWmsys1.0bin). Add this to the end of your windows PATH and restart eclipse.
Further Reading


For those who come after (and please forgive the noobness of this, I am a .Net dev making my first steps into LAMP land):
1) In my raspian jesse; the Shell.pm Perl library isnt installed by default, this library is required for auth.pl which is required by the DataStore server.
The RPi B timeouts if you try to install it via 'cpan shell'. I ran raspi-config and set GPU ram to 16 (minimum) and overclock to 'moderate', turned off the camera, CSI and pretty much anything else I could find (YMMV). Then rebooted and ran:
sudo su
curl -s -L http://cpanmin.us | perl – –self-upgrade
CPAN Shell
That solved the authentication problem.
2) Eclipse wouldn't build the stupid program on my local, was telling me it couldn't find the GCC or G++ compilers. The solution in my case was to:
Right click on the project
Properties->C/C++ General/Preprocessor Include Paths, Macros etc. and hit 'Restore Defaults' and accept. Once I did that it built without error. No idea what was going on there.
Apart from these two caveats I followed David's instructions to the letter.
I am now able to cross compile and debug from Windows 10 to Raspian(Jesse) on the RPi.
Thanks David.
I'm pleased you are up and going. Neither are problems I've seen. Thanks for sharing your workarounds – they may help someone else.
Hello Richard Davies,
Could you exactly explain me how to install that Shell.pm library because I could not understand all your steps? I've tried what you'd written above but it didn't work at all.
Thank you in advance
This comment has been removed by the author.
do you have a solution for the tools folder? i’ve downloaded a newer version of the toolchain because i couldn’t find yours. I found out that the newer versions do not have the tools folder anymore.
Hi Mousse, sorry I’ve not been using this tool chain or worked on the Raspberry Pi for a few years. I don’t know.
i have found that the version 6.3.0 has the TOOL folder